Hexo博客Next主题安装配置教程
![]()
版本
| 版本 | 年份 | 仓库 |
|---|---|---|
| v5.1.4 或更低 | 2014 ~ 2017 | iissnan/hexo-theme-next |
| v6.0.0 ~ v7.8.0 | 2018 ~ 2019 | theme-next/hexo-theme-next |
| v8.0.0 或更高 | 2020 | next-theme/hexo-theme-next |
安装
npm
1 | npm install hexo-theme-next |
使用npm安装要求Hexo是5.0及以后的版本
git
1 | git clone https://github.com/next-theme/hexo-theme-next themes/next |
指定版本安装:(以8.0.0版本为例)
1 | npm install hexo-theme-next@8.0.0 |
Hexo及插件版本:

配置
- 使用
Git安装的配置文件位于/themes/next/_config.yml - 使用
npm安装的配置文件位于node_modules/hexo-theme-next/_config.yml _config.next.yml
其中第一个`/表示博客根目录
1. 风格
1 | # Schemes |
2. 不蒜子访客统计
将busuanzi_count.enable设为true即可
1 | # Show Views / Visitors of the website / page with busuanzi. |
3. 代码高亮
1 | codeblock: |
内置代码高亮样式在/node_modules/highlight.js/styles目录下,也可在NexT Highlight Theme Preview进行预览。
4. 显示分类和标签
- 文章
header部分添加
1 | tags: Hexo |

- 新建
page
1 | hexo n page tags |
此时会在/source目录下新增两个文件夹tags和categories,且两个目录下都有一个index.md文件
- 修改
index.md
分别在tags和categories两个文件夹的index.md文件头部添加type


- 侧边栏显示标签和分类
修改Next主题配置文件_config.next.yml
1 | # Usage: `Key: /link/ || icon` |
5. 背景配置
更改标题黑色背景
- 打开
Hexo/themes/next/source/css/_schemes/Pisces/_header.styl,找到background改为background: $blue-bright;。
标题背景颜色默认为:
background: var(--theme-color);,即默认为主题颜色,可直接在_config.next.yml配置文件中修改theme_color:即可改变背景颜色
1 | theme_color: |
打开
Hexo\themes\next\source\css\_variables\Pisces.styl,找到subtitle-color改为$subtitle-color = $whitesmoke;在
Hexo/themes/next/source/css/_variables/base.styl里可以查看颜色设置。
添加图片背景
- 在hexo目录下的
source文件夹下新建_data文件夹,不是主题next目录下的source文件夹。文件夹里新建文件styles.styl,添加如下内容:
1 | //背景图片设置 |
background-image:url 可以直接使用图片链接,也可以是图片路径(将自定义图片放入next\source\images)
background-repeat:若果背景图片不能全屏,那么是否平铺显示,充满屏幕
background-attachment:背景是否随着网页上下滚动而滚动,fixed 为固定
background-size:图片展示大小,设置 100%,100% 的意义为:如果背景图片不能全屏,那么是否通过拉伸的方式将背景强制拉伸至全屏显示
- 打开主题配置文件,找到
custom_file_path:,修改如下:
1 | custom_file_path: |
页面透明化
为了更好欣赏背景图片,可将博客页面透明化,在source/_data/styles.styl里添加如下内容:
1 | //文章透明度设置 |
边框圆角
- 在hexo目录下的
source文件夹下新建_data文件夹,文件夹中新建文件variables.styl,添加如下内容:
1 | // 圆角设置 |
- 打开主题配置文件,找到
custom_file_path:,修改如下:
1 | custom_file_path: |
6. 字数统计
- 安装插件
1 | npm install hexo-word-counter |
配置查看字数统计文档
7. fancybox
fancybox 可以在点击图片时放大该图片,并且可以快速浏览当前文章的所有图片
1 | # FancyBox is a tool that offers a nice and elegant way to add zooming functionality for images. |
8. 版权声明
NexT 内置了文章末尾增加版权声明,只需手动开启即可
1 | # Creative Commons 4.0 International License. |
9. 置顶

文章header添加sticky,将会按照sticky值从大到小排序展示,默认为0

10. 更改字体
_config.next.yml中font配置
1 | # --------------------------------------------------------------- |
11. 相关文章
- 安装插件
1 | npm install hexo-related-posts |
- 修改
_config.next.yml
1 | related_posts: |
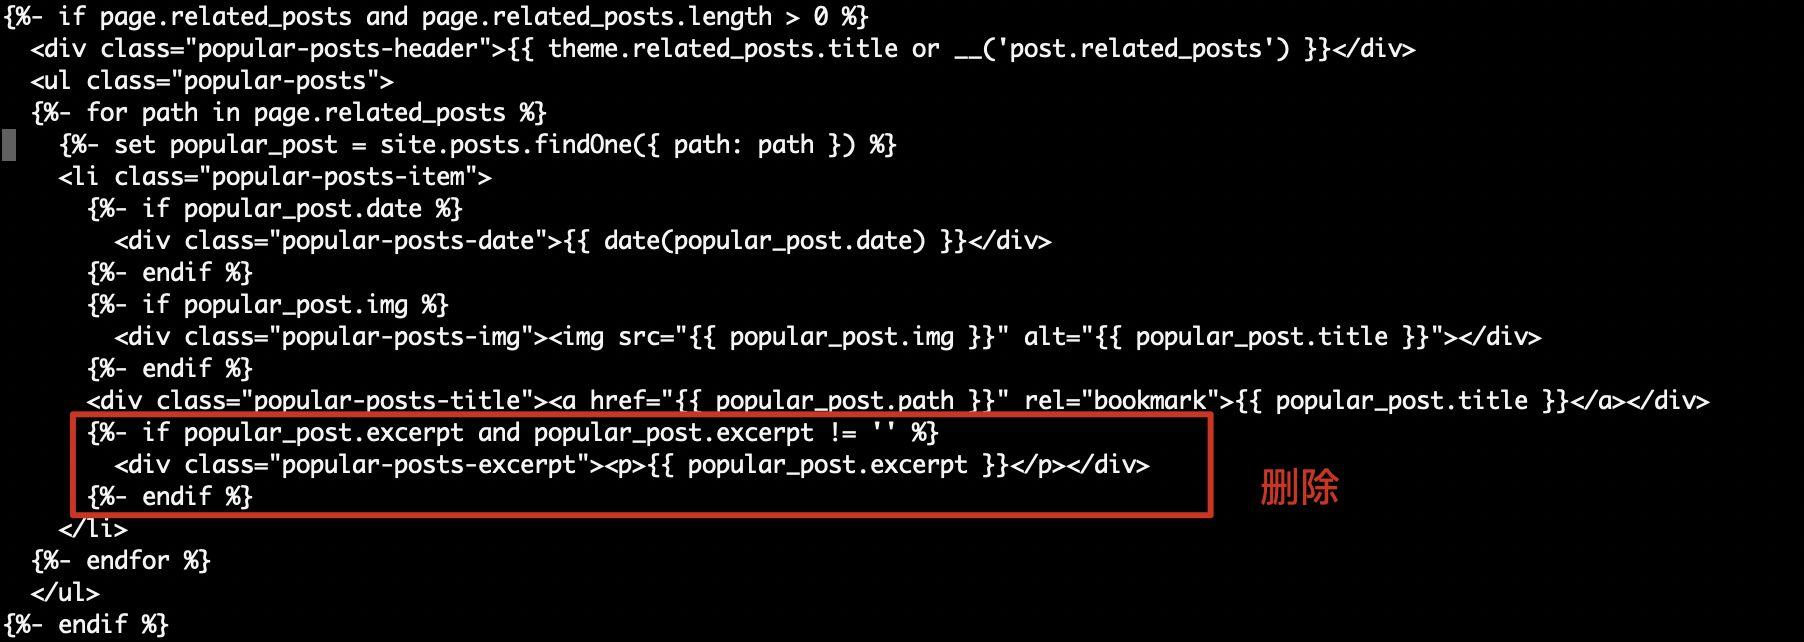
- 相关文章只显示时间和标题,不显示内容
修改/themes/next/layout/_partials/post/post-related.njk删除以下内容:

- 修复相关文章无法跳转问题
查看跳转链接可以发现,相关文章的路径是基于当前文章的,说明跳转连接用的是相对路径导致这个问题的,因此只需要采用绝对路径进行跳转即可。

修改/themes/next/layout/_partials/post/post-related.njk,在跳转路径前面加上/即可

12. Tags显示在文章头部
默认标签是显示在文章尾部的:

但在文章尾部不容易观察到,现令其显示在文章头部,效果如图:

在/themes/next/layout/_partials/post/post-meta.njk文件中添加如下内容:

1 | {# custom tags #} |
想要tag标签不在文章末尾显示,删除/themes/next/layout/_macro/post.njk文件中的如下内容即可:

13. back to top
_config.next.yml
1 | back2top: |
修改滚轮的大小,默认太小了,不易观察

滚轮样式定义在/themes/next/source/css/_common/components/back-to-top.styl文件中,查看该文件发现具体的大小有变量表示,其值定义在/themes/next/source/css/_variables/base.styl文件中

默认大小为12px,现将其改为16px

查看效果:

14. 添加备案信息
修改_config.next.yml
1 | # Beian ICP and gongan information for Chinese users. See: https://beian.miit.gov.cn, http://www.beian.gov.cn |
15. 首页和归档页单页显示数量
_config.yml
1 | # Home page setting |
16. 添加Waline评论系统
评论管理 (管理端)
- 部署完成后,请访问
<serverURL>/ui/register进行注册。首个注册的人会被设定成管理员。 - 管理员登陆后,即可看到评论管理界面。在这里可以修改、标记或删除评论。
- 用户也可通过评论框注册账号,登陆后会跳转到自己的档案页。
Hexo-waline-next插件使用rqh656418510/hexo-waline-next
安装插件:
1 | npm install hexo-waline-next --save |
17. 自定义Page
- 生成page
1 | hexo new page "xxx" |
会自动生成/source/xxx/index.md
- 启用page
修改_config.next.yml文件
1 | menu: |
-
2021-11-28
-
2021-11-28